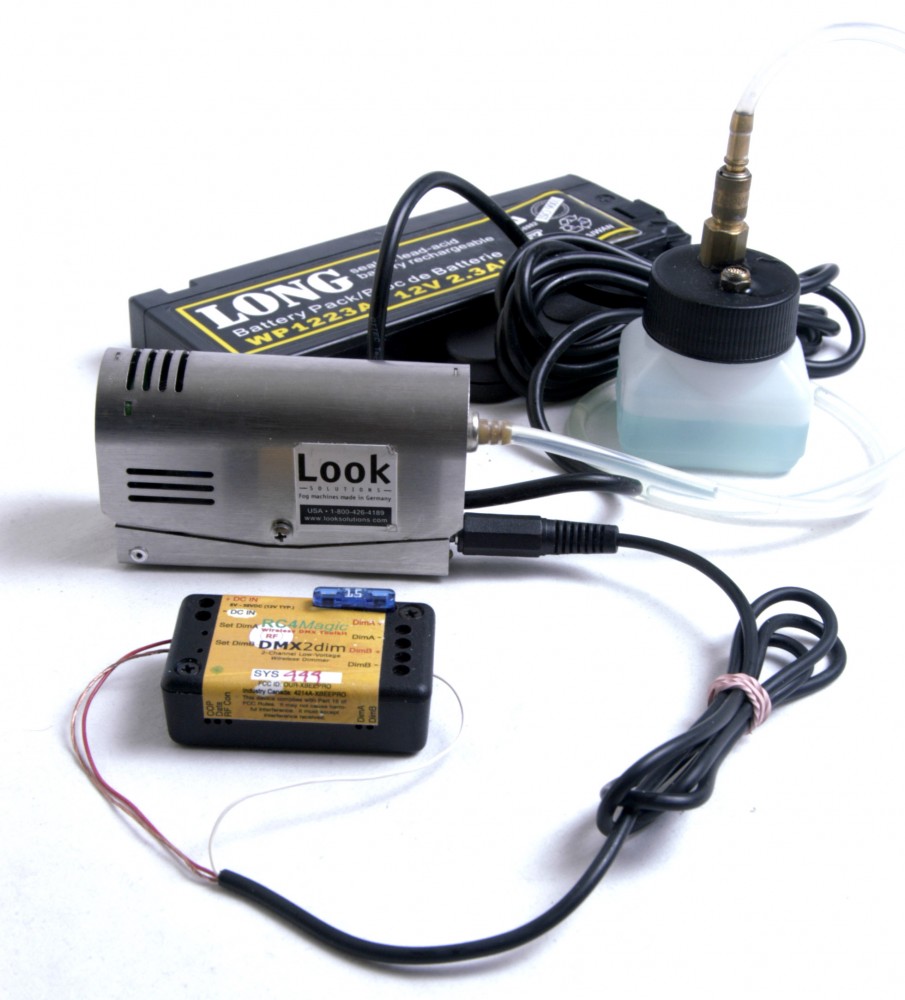
Look closely at this image.
Although it shows the original yellow-label RC4Magic, newer units connect exactly the same way.
This configuration powers the DMX2dim dimmer from the Tiny Fogger battery. The 1/8-inch miniplug remote control port on the Tiny Fogger provides ground on the sleeve (braid), and power on the tip (red). The trigger input (white) causes the fogger to run when it is shorted to ground. The DMX2dim dimmer switches on the negative side: when the dimmer is turned on, the negative output terminal connects to ground. Thus, it can be directly connected to the trigger input of the fogger. Again, that’s the *negative* side of the dimmer output, marked DimA- (or DimB-) in black.
We bought a 1/8-inch stereo miniplug-to-miniplug cable at a local electronics store and cut it in half, yielding *two* Tiny Fogger hookup cables. Every miniplug cable I’ve ever seen had red on the tip contact, but you might find a cable that puts white on the tip, or uses different colors. Thus, I recommend testing with a meter to find the two power lines (ground and +12V), then short the remaining line to ground to confirm that it triggers the fogger.
Word of caution: DO NOT ALLOW THE POWER SUPPLY LEADS TO SHORT TOGETHER. The Tiny Fogger battery is quite powerful and a dangerous situation could result.
Summary:
1/8-inch Tiny Fogger miniplug —-> DMX2dim dimmer screw terminals:
sleeve —-> negative power input (ground)
ring —-> negative (Dim-) output of dimmer (channel A or B, you choose)
tip —-> positive power input (+12V from Tiny Fogger battery)
